Car batteries don’t last forever.
If your car’s headlights start dimming, you have to jumpstart the vehicle or the battery is more than three years old, it’s time to install a new one.
Fortunately, this is a relatively straightforward job that requires no specialist skill.
You can change a car battery by following these 10 simple steps.
1. Park your car and remove the key
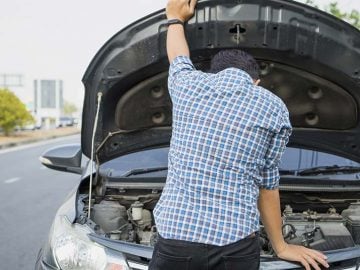
Ideally, you don’t want to install a new battery at the side of the road.
A level driveway or well-ventilated garage with the door open is the perfect place to change a car battery.
Choose somewhere secure and avoid traffic, sparks, open flames and water.
Park the car, engage the brake, turn off the engine and remove the key to ensure no power is going to the battery.
IMPORTANT NOTE: disconnecting the battery may reset the electronics in your car – the clock, radio, infotainment system, navigation and alarm settings. Make sure you know any permission codes, which you will need when you restart the car. Consider using a memory saver, a connector with a small battery that has just enough voltage and current to keep all of the car’s computer memory alive while the main battery is being changed.
2. Locate the battery
Remove your watch, rings and put on old clothing that you don’t mind getting dirty. Wear insulated gloves and a pair of safety goggles.
Prop up the bonnet and locate the battery. It has two cables attached to it.
In most cars, you’ll find it in a corner of the engine bay. It may be under a plastic cover.
If you don’t see it, the owner’s manual will tell you where it is.
Some manufacturers install the battery under a seat, in the boot or behind a wheel well.
3. Identify the terminals
Just like an AA battery, your car battery has two terminals, a positive and a negative. Identify the terminals and the cables attached to each one.
The positive terminal may be red, have a red plastic cover over it or the cable attached to it may be red. There should be a + symbol stamped next to the positive terminal.
Commonly, the negative terminal is black and has a negative sign next to it.
4. Disconnect the negative cable
It’s time to remove the cables from the battery. Some battery terminals have quick-release clamps, so it’s easy to remove the cables.
Others are screwed on and you will need a wrench to loosen a bolt or nut.
Always disconnect the negative cable first. This prevents electrical shorts.
Secure it with a cable tie making sure it doesn’t come in contact with anything metal.
IMPORTANT NOTE: you must be careful that neither your wrench nor any metal object touches both battery terminals, or a terminal and any other metal part of the car (like the bonnet or the body), at the same time. This would create an electric circuit and cause sparks to fly.
5. Disconnect the positive cable
Detach the positive terminal and use a cable tie tuck it out of the way.
If you’re using a wrench remember not to let it touch any metal part of the car.
6. Remove the battery
Once the cables are detached you need to free the battery, which is held in place by a retaining system – a clamp, straps or metal plate.
You’ll probably need a wrench to loosen any connectors or fasteners and lift the battery out of the engine bay (or wherever it is). Keep any bolts or screws safe.
A car battery is heavy and you might require help. Lift it out and put it down on a concrete surface, if possible.
7. Clean the battery terminals
You need to examine the terminals attached to the ends of the two battery cables to check they’re clean and corrosion-free.
If they’re dirty with a build-up of green/grey/blue/white powder, use a terminal-cleaning brush (if there’s one), a wire brush, emery cloth or 100-grit sandpaper to clean the corrosion off until they’re shiny.
The cleaner they are, the better connection your battery will have.
8. Position the new battery
Make sure the new battery is oriented the same way as the old one with the positive (red) post in position to match the positive terminal and cable’s location.
Then place the new battery in position and secure it with the retaining system removed earlier.
9. Grease the terminals
Most new batteries come with anti-corrosion washers and lithium grease to keep terminals free of dirt and prevent corrosion.
Coat each of the terminals in a thin layer of lithium grease.
Be careful to only spray the grease on the positive and negative terminals, no other parts of the engine.
10. Connect the new battery
Always connect the cable to the positive battery terminal first so you don’t inadvertently complete the electrical circuit before everything is connected.
Once again, make sure the wrench doesn’t come in contact with any metal part.
Tighten, but don’t over-tighten, the terminal end.
Then connect the cable to the negative terminal.
If your battery has a plastic cover, replace it now.
Check there are no tools in the engine bay, close the bonnet and you’re done.
Congratulations! You just changed your first car battery.
How to clean corroded battery terminals
Sometimes, a battery still has life in it but build-up on the terminals stops it from working well.
You may not need a new battery, just a simple clean of the terminals.
The terminals can easily be cleaned using bicarbonate of soda. Here’s how.
Masterparts
Masterparts supplies batteries for a wide range of car makes and models, including a full range of maintenance-free car batteries.
These batteries don’t need topping up with fluid and are resistant to corrosion, resulting in longer battery life. All batteries carry a 24-month warranty.
Contact us if there’s a part you need and we’ll be happy to help.